Fretless Bass Conversion… Part V (Final)
by Daniel Menjívar • #diy #musicSo the bass is finally done and it sounds amazing! When I first found this bass at Axe Music, it shocked me at how much better it sounded (and how much better it played) than other basses priced five times as much. And now, it’s definitely too nice to consider a "beater bass" for sure – it’s come a long way!
Here’s a brief overview of the changes:
- First, I pulled out the frets and filled the spaces with wood filler. Thanks to the dark "chocolate" colored wood filler and the dying process that followed, the fret lines are barely visible and there is virtually no splintering visible.
- The black-dyed rosewood fingerboard was covered with clear epoxy and sanded down to make sure the fingerboard was perfectly level (no low spots, no high spots, etc.). The glossy glass-like finish was restored using micro-mesh sanding pads.
- The neck was sanded down to make it slimmer and reshaped slightly to make it more comfortable to play. it’s now a very comfortable, fast-feeling neck.
- The thick finish and paint were stripped off the body – you can now hear the wood and the bass sounds much less compressed – it can breathe!
- The body was reshaped slightly to allow easier access to the upper frets as well as to round out the edges.
- The body and neck were dyed transparent black (you can see the grain of the wood through the dye) and topped with a very thin coat of urethane that was buffed to create a soft-looking matte finish.
- The tuners were replaced with lightweight Gotoh GB7 tuners so the neck feels more balanced with the body now.
- The other hardware parts (bridge, strap pins, neck screws, etc.) were dry filmed black and they look amazing. Much more durable than any spray paint, and now they’re protected against rust, corrosion, abrasion, etc. too! Did I mention how good they look?
- The electronics cavity was shielded, the pots were cleaned and re-soldered and the bridge is also grounded much better now.
- The knobs were changed to rubber grip knobs – they not only look and feel nice, but it’s also a lot easier to finely control the volume and tone now too.
it’s not my first time making any of these modifications to a bass, so I knew what to expect going into it. The hardest, most time-consuming part was the dying process though. I had to keep reminding myself that the dye was supposed to be transparent (that’s what I wanted) and that the grain was supposed to be showing through. It was a little frustrating that the body didn’t want to take the dye evenly in some spots at first, but now that it’s assembled, it looks much better than I was anticipating. Sometimes being a perfectionist is a bad thing! Also, I’m glad I was able to get away with only a thin coat of the urethane finish (two actually). The bass is still well-protected and I didn’t have to mute the wood so much with loads of finish. (Nor did I need the sealer.) The look of the matte finish is a very nice contrast to the glass-like finish of the epoxied fingerboard, and it feels really nice to touch too – like an oil finish almost…
In retrospect, I’m really glad that I couldn’t get the bridge I ordered from AllParts. Dry filming this bridge was definitely the way to go (even though it cost more than a replacement bridge) since I was able to keep the same string spacing as well as the same lightweight bridge. The bridge looks like any new black bridge you’d buy in a store – I was pleasantly surprised at the results I got from the dry filming company.
OK, here are some final photographs of the bass:
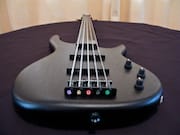
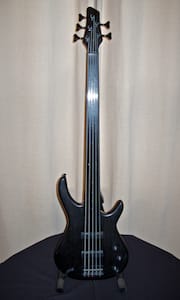
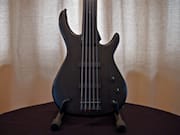
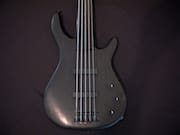
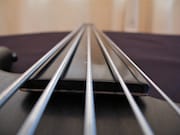
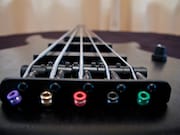
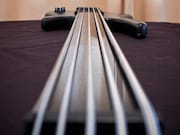
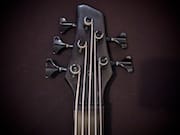
The photos were taken just after I assembled the bass and put new strings on (D’Addario EPS165 ProSteels with a tapered .135 B string). After I took the photos, I set-up the bass (set the intonation, action, truss rod, etc.) and the neck had to be shimmed slightly. The bass now plays really really well :-)
Every time I pick up the bass, I’m shocked at how light it is! And it’s really comfortable to play and hard to set down…
For simplicity sake, Here’s a list of links to the other (previous) parts:
- Fretless Bass Conversion… Part I
- Fretless Bass Conversion… Part II
- Fretless Bass Conversion… Part III
- Fretless Bass Conversion… Part IV
And here are some links to the bass’ sale ads:
I decided not to share an audio sample of the bass, mostly because of time constraints, but also because I didn’t want to influence people’s buying decisions with my playing nor my choice of what to record… (But mostly time constraints…) Plus, the bass really does need to be heard in person – it sounds big and tight and aggressive! Surprisingly so.
If I do decide do upload an audio sample of the bass in the future, I’ll submit it as a comment below…